Poolin EOC990 Common Problems and Troubleshooting
Welcome to our guide on troubleshooting common problems with the Poolin EOC990 sewing machine. If you own this versatile and powerful sewing machine, you may encounter certain issues during your sewing journey. In this article, we’ll address these problems and provide solutions to ensure that you can make the most of your Poolin EOC990 without any hassles.
Poolin EOC990 Overview
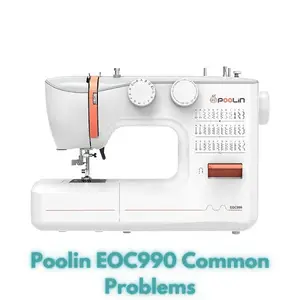
The Poolin EOC990 is a feature-rich computerized sewing machine designed to cater to various sewing needs. With its 107 stitch applications, adjustable stitch length and width, and two sewing modes, this machine is perfect for home use. The machine comes with 8 included presser feet, allowing you to explore different sewing techniques and styles.
Product Details
| Brand | Poolin |
|---|---|
| Color | Decorative stitching |
| Material | Plastic, Metal |
| Product Dimensions | 6.7″D x 16.5″W x 11.8″H |
| Item Weight | 5.8 Kilograms |
| Power Source | Corded Electric |
| Is Electric | Yes |
Features
- Powerful Teaching System: The machine includes a series of teaching videos and detailed instructions to make learning easy.
- Multifunction: With 108 stitch applications, the machine is suitable for both sewing and decorative stitching.
- Worry-Free after Sales: Each machine undergoes a sewing test before leaving the factory, and after-sales support is provided.
- Machine Size and Weight: The machine’s larger size and metal body provide a stable sewing experience.
- Free Teaching Service: Professional one-on-one teaching and online learning groups are available to assist users.
Causes of Common Problems with the Poolin EOC990
In the following sections, we will delve into various common problems that users may encounter with the Poolin EOC990 sewing machine. Additionally, we will provide step-by-step solutions to help you resolve these issues and continue enjoying your sewing experience.
Common Problems and Troubleshooting
1. Thread Tension Inconsistency
Description: You notice uneven stitches and loops on your fabric.
Cause: Incorrect thread tension settings can lead to uneven stitching.
Troubleshooting:
- Ensure the machine is threaded correctly, following the manual’s instructions.
- Check the upper thread tension dial; adjust it slightly higher or lower as needed.
- Inspect the bobbin case for lint or thread debris; clean it thoroughly.
- Experiment with scrap fabric to find the ideal tension settings for your project.
2. Jammed Bobbin Thread
Description: The bobbin thread keeps jamming or breaking.
Cause: Incorrect bobbin insertion or tangled thread can cause jams.
Troubleshooting:
- Remove the bobbin case and clean any debris or tangled threads.
- Reinsert the bobbin correctly, ensuring it rotates smoothly when pulled.
- Check that the upper thread is properly threaded and tensioned.
- Use a good-quality thread and ensure the bobbin thread matches the upper thread in weight and type.
3. Skipped Stitches
Description: The machine occasionally skips stitches, leaving gaps in the fabric.
Cause: Dull or improperly inserted needle, fabric type, or incorrect stitch settings.
Troubleshooting:
- Replace the needle with a new one, ensuring it’s suitable for the fabric type.
- Check the needle insertion; it should be oriented correctly and fully seated.
- Use appropriate stitch settings for the fabric; heavier fabrics may require slower sewing speeds.
- Re-thread the machine and ensure proper tension.
4. Uneven Feed or Fabric Pulling
Description: The fabric is being pulled unevenly, resulting in uneven seams.
Cause: Incorrect presser foot pressure or feed dog settings.
Troubleshooting:
- Adjust the presser foot pressure according to the fabric thickness; lighter fabrics need less pressure.
- Check if the feed dogs are engaged properly; ensure they move the fabric smoothly.
- Use appropriate presser feet for different fabric types to avoid excess pulling.
- Guide the fabric gently with your hands to prevent excessive tension.
5. Needle Breakage
Description: Needles break frequently during sewing.
Cause: Incorrect needle type, bent or damaged needle, sewing through multiple layers without proper adjustments.
Troubleshooting:
- Ensure you’re using the correct needle type for the fabric you’re sewing.
- Replace the needle if it’s bent or damaged.
- Adjust the machine settings when sewing through thick or multiple layers of fabric.
- Check the needle alignment; it should be straight and securely attached.
6. Bobbin Thread Not Catching
Description: The upper thread seems fine, but the bobbin thread isn’t forming stitches.
Cause: Improperly wound bobbin, incorrectly threaded bobbin case, or lint accumulation.
Troubleshooting:
- Rewind the bobbin thread carefully, ensuring it’s evenly wound.
- Check the bobbin case threading; it should follow the correct path.
- Inspect the bobbin area for lint, debris, or thread tangles; clean if necessary.
- Confirm the bobbin is correctly inserted and the bobbin case is properly closed.
7. Erratic Stitching
Description: The machine produces inconsistent stitches, alternating between tight and loose.
Cause: Incorrect presser foot pressure, uneven fabric feeding, or tension issues.
Troubleshooting:
- Adjust the presser foot pressure to match the fabric thickness.
- Ensure the fabric is feeding evenly and isn’t getting caught or dragged.
- Re-thread both the upper thread and the bobbin, ensuring proper tension.
- Check that the feed dogs are clean and properly aligned.
8. Machine Overheating
Description: The sewing machine becomes unusually hot during use.
Cause: Extended sewing sessions, inadequate ventilation, or mechanical issues.
Troubleshooting:
- Give the machine a break after prolonged use to prevent overheating.
- Ensure the machine is placed on a flat, stable surface with proper ventilation.
- Check for obstructions around the motor and ensure it’s properly lubricated.
- If overheating persists, consult the user manual or a professional technician.
9. Needle Hits Presser Foot
Description: The needle strikes the presser foot or throat plate while sewing.
Cause: Incorrect needle position, bent needle, or incorrect presser foot attachment.
Troubleshooting:
- Ensure the needle is correctly inserted and aligned; it should be straight.
- Replace the needle if it’s bent or damaged.
- Check the presser foot attachment; it should match the stitch type and fabric thickness.
- Practice slow, steady sewing to avoid needle and foot collisions.
10. Thread Bunching Under Fabric
Description: Threads gather in a messy tangle under the fabric instead of forming proper stitches.
Cause: Incorrect threading, tangled threads, or bobbin case issues.
Troubleshooting:
- Re-thread the machine carefully, following the proper threading path.
- Check both the upper thread and bobbin for tangles or knots.
- Inspect the bobbin case for proper insertion and potential obstructions.
- Adjust the upper thread tension and experiment with different tension settings.
11. Uneven Stitch Length
Description: Stitches vary in length, resulting in an inconsistent appearance.
Cause: Incorrect stitch length setting, machine vibration, or mechanical issues.
Troubleshooting:
- Check the stitch length setting; adjust it according to your desired stitch length.
- Ensure the machine is placed on a stable surface to minimize vibrations.
- Inspect the feed dogs and needle plate for debris or obstructions.
- If the problem persists, consider a professional inspection of the machine’s mechanics.
12. Fabric Doesn’t Move
Description: The fabric doesn’t feed forward as you sew.
Cause: Disengaged feed dogs, improper presser foot pressure, or tangled threads.
Troubleshooting:
- Ensure the feed dogs are engaged; consult the manual for instructions.
- Adjust the presser foot pressure to ensure proper fabric feeding.
- Check the threading, both upper thread and bobbin, for any tangles or knots.
- Guide the fabric gently with your hands to assist in feeding, if necessary.
13. Stitching Misalignment
Description: Stitches don’t align with the seam guide or fabric edge.
Cause: Improper needle position, inaccurate seam guide settings, or skewed fabric.
Troubleshooting:
- Ensure the needle is centered and aligned according to the desired seam width.
- Adjust the seam guide settings to match your stitching requirements.
- Carefully align the fabric with the seam guide before sewing.
- Practice with scrap fabric to achieve precise stitching alignment.
14. Thread Breakage
Description: The thread frequently breaks during sewing.
Cause: Tension issues, incorrect needle type, or sharp fabric edges.
Troubleshooting:
- Check both upper and bobbin thread tensions; adjust as needed.
- Use the appropriate needle type and size for the fabric you’re sewing.
- Inspect the fabric edges for sharp points that might be causing thread breakage.
- Ensure the machine is properly threaded, and the thread path is clear of obstructions.
15. Motor Running But Needle Doesn’t Move
Description: The motor is running, but the needle isn’t moving to sew.
Cause: Disconnected or broken drive belt, mechanical issues, or power supply problems.
Troubleshooting:
- Check the drive belt for any disconnections or damage; replace if necessary.
- Inspect the machine’s mechanics for any obstructions or jammed parts.
- Ensure the machine is properly plugged in and receiving power.
- If the problem persists, seek professional repair or consultation.
16. Uneven Stitches on Thick Fabrics
Description: Stitches become uneven or skipped when sewing through thick fabrics.
Cause: Insufficient needle penetration, improper thread tension, or incorrect needle type.
Troubleshooting:
- Use a heavier-duty needle suitable for thick fabrics.
- Adjust the thread tension to accommodate the thickness of the fabric.
- Experiment with slower sewing speeds to allow the machine to handle the thickness better.
- Consider using a walking foot attachment for improved fabric feeding.
17. Fabric Puckering
Description: The fabric gathers or wrinkles around the stitches.
Cause: Incorrect tension settings, inadequate fabric handling, or improper stitch length.
Troubleshooting:
- Check and adjust the thread tension to find the right balance for your fabric.
- Support the fabric evenly while sewing to prevent excessive pulling or stretching.
- Use a stabilizer or interfacing for lightweight or delicate fabrics.
- Choose an appropriate stitch length to prevent fabric distortion.
18. Thread Keeps Tangling in Bobbin Area
Description: The thread consistently tangles and bunches up in the bobbin area.
Cause: Improper bobbin winding, incorrect bobbin insertion, or thread tension issues.
Troubleshooting:
- Ensure the bobbin is wound evenly and tightly.
- Reinsert the bobbin correctly into the bobbin case, following the machine’s guidelines.
- Check the upper thread tension to prevent excessive thread pulling on the bobbin thread.
- Clean the bobbin area regularly to remove lint and thread debris.
19. Reverse Stitching Problems
Description: The reverse stitch function isn’t working as expected.
Cause: Mechanical issues with the reverse stitch lever or button, jammed mechanisms.
Troubleshooting:
- Ensure the machine is properly threaded and in the correct sewing mode before using reverse stitching.
- Check for any obstructions or debris around the reverse stitch mechanism.
- Engage the reverse stitch slowly and gently, avoiding sudden force.
- If the problem persists, consult the user manual or seek professional repair.
20. Inconsistent Buttonholes
Description: The buttonholes created by the machine are of varying sizes or quality.
Cause: Incorrect buttonhole settings, incorrect foot attachment, or fabric slippage.
Troubleshooting:
- Refer to the machine’s manual to correctly set up the buttonhole function.
- Ensure the buttonhole foot is attached securely and properly aligned.
- Use stabilizer or interfacing to prevent fabric slippage during buttonhole creation.
- Practice on scrap fabric before attempting buttonholes on your project.
21. Thread Fraying or Breaking
Description: The thread frays or breaks frequently during sewing.
Cause: Using low-quality thread, incorrect thread tension, or sharp needle plate edges.
Troubleshooting:
- Use high-quality thread suitable for the fabric you’re working with.
- Adjust the thread tension to find the right balance for your specific thread and fabric.
- Check the needle plate for any sharp edges; smooth them if necessary.
- Ensure the upper thread is correctly threaded and passing through all guides.
22. Fabric Skips Stitches
Description: The machine skips stitches, leaving gaps in the fabric.
Cause: Dull or bent needle, incorrect threading, or fabric thickness.
Troubleshooting:
- Replace the needle with a new one suitable for the fabric type.
- Re-thread the machine following the correct threading path.
- Adjust the thread tension to match the fabric and thread combination.
- Slow down the sewing speed when working with thicker fabrics.
23. Needle Hits the Bobbin Case
Description: The needle hits the bobbin case or other machine parts while sewing.
Cause: Incorrect needle position, improper machine setup, or damaged needle.
Troubleshooting:
- Ensure the needle is inserted correctly and facing the right direction.
- Check that the presser foot is properly attached and aligned.
- Verify that you’re using the appropriate needle size and type for your project.
- If the problem persists, inspect the machine for any misaligned parts or issues.
24. Stuck or Jammed Handwheel
Description: The handwheel becomes difficult to turn or gets stuck.
Cause: Thread tangles, debris in the bobbin area, or mechanical issues.
Troubleshooting:
- Stop the machine and unplug it before attempting to address the issue.
- Open the bobbin area and remove any tangled threads or debris.
- Gently turn the handwheel back and forth to release any jams or tangles.
- If the handwheel remains stuck, seek professional assistance for repairs.
25. Thread Knots on the Underside
Description: Knots or loops of thread appear on the underside of the fabric.
Cause: Incorrect threading, bobbin winding issues, or tension problems.
Troubleshooting:
- Re-thread the machine following the correct threading path, ensuring proper tension.
- Check the bobbin winding; rewind it if it’s uneven or too loose.
- Adjust the bobbin tension if your machine allows for such adjustments.
- Experiment with different thread and tension settings to achieve optimal results.
Poolin EOC990 Sewing Machine User Reviews
Positive Reviews from Poolin EOC990 Sewing Machine Users
- Many users were satisfied with the following parameters associated with their positive experience:
- Easy-to-use features, suitable for beginners and professionals alike.
- Comprehensive instruction manual and teaching videos for learning and reference.
- Impressive assortment of stitch options and customization for various materials.
- Well-designed LED light and foot pedal for comfortable sewing.
- Included presser feet and accessories that exceeded initial expectations.
- Robust build quality and stability due to the significant metal frame.
- Aesthetic design that balances functionality and visual appeal.
- Responsive and helpful customer support, reflecting the manufacturer’s dedication.
- These positive experiences indicate that the Poolin EOC990 sewing machine is versatile, user-friendly, and backed by solid customer service.
Negative User Reviews of the Poolin EOC990 Sewing Machine
- Some users encountered the following problems associated with their negative experiences:
- Needle breaking and difficulty in sewing through various fabrics, impacting user satisfaction.
- Issues with bobbin area functionality, leading to tangling, jamming, or needle hits.
- Mixed reviews about buttonhole quality, highlighting inconsistencies in stitching.
- Concerns about the reverse stitching function not working as expected in some instances.
- Thread fraying, breaking, and knotting issues affecting the sewing process.
- Handwheel jams and difficulties turning, leading to disruptions in sewing sessions.
- These negative experiences underscore the importance of proper threading, fabric selection, and maintenance for optimal performance.
It’s important to note that all the information about user reviews is derived from Walmart website.
Overall, the majority of users expressed satisfaction with the Poolin EOC990 sewing machine, rating it highly with 5.0 out of 5 stars. The positive feedback indicates that the machine’s features, build quality, and customer support have contributed to a positive sewing experience for a wide range of users.
Poolin EOC990 Sewing Machine Manual
The operating instructions and user manual for the Poolin EOC990 sewing machine can be found on the manufacturer’s official website. Please visit the manufacturer’s website to access the detailed manual, which provides comprehensive guidance on setting up, using, and maintaining your sewing machine.
Poolin EOC990 Frequently Asked Questions
1. How can I prevent needle breakage while sewing?
Needle breakage can occur due to various factors, such as using the wrong needle type, incorrect threading, or sewing through thick fabrics. To prevent this, ensure you’re using the appropriate needle for your fabric, thread the machine correctly, and adjust the tension to match your material.
2. What should I do if my thread keeps tangling in the bobbin area?
If your thread consistently tangles in the bobbin area, first check that the bobbin is wound evenly and inserted correctly. Also, make sure the upper thread tension is appropriate. Regularly clean the bobbin area from lint and debris to avoid thread tangling.
3. How can I improve buttonhole quality on the Poolin EOC990?
For better buttonhole quality, ensure you’re using the correct presser foot and stabilizer for your fabric. Follow the manual’s instructions for creating buttonholes and experiment with different thread tensions to find the optimal setting. Practice on scrap fabric to achieve consistent results.
4. Why is my handwheel stuck or jammed?
If the handwheel becomes stuck or jammed, it might be due to tangled threads, debris in the machine, or a mechanical issue. Always stop the machine and unplug it before attempting to address the problem. Open the bobbin area to clear any tangles or debris, and gently turn the handwheel to release jams.
5. Can I sew through thick fabrics with the Poolin EOC990?
Yes, the Poolin EOC990 is designed to handle a variety of fabrics, including thicker ones. Use a suitable needle and adjust the thread tension accordingly. If necessary, sew at a slower pace to allow the machine to handle thicker fabrics more effectively.
Conclusion
Whenever you encounter an issue with your Poolin EOC990 sewing machine, remember to consult the user manual for guidance. Additionally, reach out to customer service or visit a service center if needed. Proper maintenance, correct threading, and understanding your machine’s features can help you enjoy a smooth sewing experience with your Poolin EOC990.
Poolin EOC2100 Common Problems