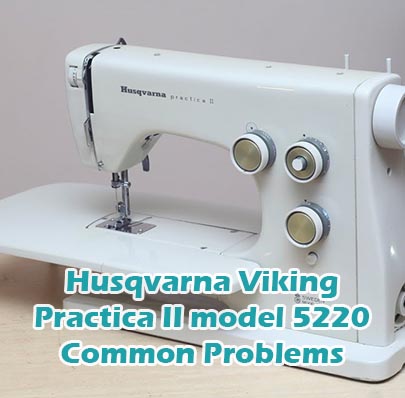
Husqvarna Viking Practica II model 5220 Common Problems and Troubleshooting
Welcome to our guide on addressing common problems with the Husqvarna Viking Practica II model 5220 sewing machine. Whether you’re a seasoned user or just starting out, encountering issues with your sewing machine can be frustrating. In this article, we’ll delve into various problems that users may face with this specific model and provide troubleshooting tips to help you get back to sewing smoothly.
Common Problems with the Husqvarna Viking Practica II model 5220
-
Thread Breakage
Description of the problem: Threads keep breaking during sewing.
Cause of the problem: Incorrect threading or tension settings.
Troubleshooting step-by-step:
- Re-thread the machine following the threading guide specific to the Husqvarna Viking Practica II model 5220.
- Check and adjust the tension settings according to the user manual.
- Ensure the needle is correctly installed and not bent or damaged.
- Use high-quality thread appropriate for the fabric being sewn.
- Clean the machine and remove any lint or debris that may be causing interference.
-
Uneven Stitching
Description of the problem: Stitches are uneven or skipping stitches.
Cause of the problem: Incorrect needle or presser foot attachment.
Troubleshooting step-by-step:
- Ensure the needle is inserted correctly and securely into the needle clamp.
- Check that the correct presser foot is installed for the selected stitch.
- Adjust the stitch length and width settings as needed.
- Inspect the bobbin and bobbin case for any debris or thread tangles.
- Try using a different type or size of needle suitable for the fabric being sewn.
-
Machine Jamming
Description of the problem: The machine gets stuck or jams while sewing.
Cause of the problem: Accumulation of lint or debris in the bobbin area.
Troubleshooting step-by-step:
- Turn off the machine and unplug it from the power source.
- Carefully remove the needle plate and clean out any lint or debris from the bobbin area using a brush or vacuum.
- Inspect the bobbin case for any damage or irregularities.
- Reassemble the machine and test sew on a scrap piece of fabric.
-
Needle Breakage
Description of the problem: Needles keep breaking during sewing.
Cause of the problem: Using the wrong needle size or type for the fabric.
Troubleshooting step-by-step:
- Check that the needle is appropriate for the fabric being sewn.
- Replace the needle with a new one if it is bent or damaged.
- Ensure the needle is inserted correctly and tightened securely.
- Lower the presser foot before starting to sew to prevent needle flexing.
- Reduce the sewing speed and avoid sewing over thick seams or materials.
-
Bobbin Tension Issues
Description of the problem: Uneven tension or loose bobbin thread.
Cause of the problem: Improperly adjusted bobbin tension or incorrect bobbin winding.
Troubleshooting step-by-step:
- Check the bobbin winding tension and adjust if necessary.
- Ensure the bobbin is inserted correctly into the bobbin case.
- Adjust the bobbin tension screw according to the user manual.
- Use the correct type and weight of thread in both the needle and bobbin.
- Clean the bobbin area and remove any lint or debris that may affect tension.
Fabric Puckering
Description of the problem: Fabric gathers or puckers while sewing.
Cause of the problem: Incorrect tension settings or using the wrong needle.
Troubleshooting step-by-step:
- Adjust the tension settings for both the upper thread and bobbin thread.
- Try using a different needle size or type, such as a ballpoint needle for knits.
- Ensure the fabric is properly aligned and smooth before sewing.
- Check the presser foot pressure and adjust if necessary.
- Experiment with different stitch lengths and widths to reduce puckering.
Noise During Operation
Description of the problem: Unusual or loud noises coming from the sewing machine.
Cause of the problem: Loose or worn machine parts, such as belts or gears.
Troubleshooting step-by-step:
- Inspect the machine for loose screws, bolts, or other components.
- Check the condition of belts and gears and replace if worn or damaged.
- Apply lubricant to moving parts as recommended in the user manual.
- Test sew on different fabrics to see if the noise persists.
- If the noise continues, contact a qualified technician for further inspection.
Bobbin Thread Showing on Top
Description of the problem: Bobbin thread is visible on the top side of the fabric.
Cause of the problem: Incorrect threading or bobbin tension.
Troubleshooting step-by-step:
- Re-thread the machine, ensuring the bobbin thread is correctly inserted into the bobbin case.
- Check the bobbin tension and adjust if necessary using the tension screw.
- Make sure the upper thread is properly tensioned and threaded through all guides and tension discs.
- Test sew on scrap fabric to confirm the issue is resolved.
- If the problem persists, consider replacing the bobbin case or seeking professional assistance.
Machine Not Powering On
Description of the problem: The sewing machine does not respond when the power switch is turned on.
Cause of the problem: Electrical connection issues or a malfunctioning power switch.
Troubleshooting step-by-step:
- Check that the power cord is securely plugged into the outlet and the machine.
- Inspect the power switch for any visible damage or debris that may be obstructing its operation.
- Test the outlet with another device to ensure it is functioning correctly.
- If the machine still does not power on, contact customer support or a qualified technician for assistance.
- Consider checking the machine’s fuse or circuit breaker if applicable.
Stitch Tension Variation
Description of the problem: Inconsistent stitch tension throughout the sewing process.
Cause of the problem: Fluctuations in thread tension or bobbin winding.
Troubleshooting step-by-step:
- Ensure both the upper thread and bobbin thread are correctly tensioned.
- Check for any knots or tangles in the bobbin thread before sewing.
- Clean the tension discs and bobbin case area to remove any debris.
- Test sew on scrap fabric while adjusting the tension settings to find the optimal balance.
- If the problem persists, consult the user manual for advanced tension adjustment options or seek professional assistance.
Needle Threader Malfunction
Description of the problem: The automatic needle threader fails to work properly.
Cause of the problem: Misalignment or damage to the needle threader mechanism.
Troubleshooting step-by-step:
- Ensure the needle is in the highest position before attempting to use the needle threader.
- Inspect the needle threader for any visible damage or obstruction.
- Try manually threading the needle to ensure the needle itself is not causing the issue.
- Clean the needle threader mechanism with a soft brush to remove any dust or debris.
- If the problem persists, consult the user manual for troubleshooting or seek professional repair.
Bobbin Winding Problems
Description of the problem: Difficulty in winding thread onto the bobbin.
Cause of the problem: Improperly installed bobbin or issues with the bobbin winding mechanism.
Troubleshooting step-by-step:
- Ensure the bobbin is inserted onto the winding spindle correctly.
- Check that the bobbin winder is engaged properly and not slipping.
- Use a different bobbin if the current one is warped or damaged.
- Check for any tangles or knots in the thread spool that may be affecting winding.
- If the problem persists, consider lubricating the bobbin winding mechanism or seeking professional assistance.
Feed Dog Issues
Description of the problem: Feed dogs fail to move the fabric properly during sewing.
Cause of the problem: Accumulation of lint or debris obstructing the feed dog mechanism.
Troubleshooting step-by-step:
- Turn off the machine and remove the needle plate to access the feed dog area.
- Clean the feed dogs and surrounding area thoroughly with a brush or vacuum.
- Check the feed dog height adjustment and ensure it is set correctly for the fabric thickness.
- If the feed dogs still do not function properly, contact customer support for further assistance.
- Consider having the machine professionally serviced to address any mechanical issues with the feed dog mechanism.
Buttonhole Malfunction
Description of the problem: Irregular or incomplete buttonholes are produced.
Cause of the problem: Incorrect buttonhole settings or issues with the buttonhole foot.
Troubleshooting step-by-step:
- Ensure the buttonhole foot is attached securely and aligned properly.
- Check the buttonhole settings on the machine and adjust as needed for the desired buttonhole size.
- Test sew on scrap fabric to ensure the buttonhole function is working correctly.
- Inspect the buttonhole foot for any visible damage or debris that may be affecting its performance.
- If the problem persists, consult the user manual for troubleshooting tips specific to buttonhole issues or seek professional assistance.
Thread Nesting Underneath
Description of the problem: Excess thread forms loops or nests underneath the fabric.
Cause of the problem: Tension imbalance or improper bobbin insertion.
Troubleshooting step-by-step:
- Check the bobbin threading and ensure it is correctly inserted into the bobbin case.
- Adjust the bobbin tension slightly to balance it with the upper thread tension.
- Inspect the upper thread path for any snags or tangles that may be causing the issue.
- Clean the bobbin area and remove any lint or debris that may be obstructing the thread path.
- If necessary, re-thread the machine completely and test sew on scrap fabric to confirm the issue is resolved.
Thread Tension Discs Not Engaging
Description of the problem: The tension discs fail to grip the thread properly.
Cause of the problem: Accumulation of lint or debris between the tension discs.
Troubleshooting step-by-step:
- Turn off the machine and unplug it from the power source.
- Open the tension control assembly and inspect for any lint or debris buildup.
- Clean the tension discs carefully using a soft brush or compressed air.
- Apply a small amount of sewing machine oil to lubricate the tension discs if necessary.
- Test sew on scrap fabric to ensure the tension discs are gripping the thread properly.
Needle Position Misalignment
Description of the problem: The needle does not align correctly with the fabric.
Cause of the problem: Incorrect needle positioning or bent needle.
Troubleshooting step-by-step:
- Ensure the needle is inserted into the needle clamp straight and securely.
- Check the needle position adjustment settings on the machine and adjust if necessary.
- Inspect the needle for any signs of bending or damage and replace if needed.
- Manually adjust the needle position if the machine allows for it.
- If the problem persists, consult the user manual for advanced troubleshooting options or seek professional assistance.
Thread Cutter Not Functioning
Description of the problem: The automatic thread cutter does not cut the thread properly.
Cause of the problem: Dull or misaligned thread cutter blade.
Troubleshooting step-by-step:
- Inspect the thread cutter blade for any signs of dullness or damage.
- Use a magnifying glass to check for any debris or thread caught in the blade mechanism.
- Clean the thread cutter area carefully using a brush or compressed air.
- Manually trim the thread using scissors if the automatic thread cutter fails to function.
- If the problem persists, contact customer support or a qualified technician for further assistance.
Stitch Length Variation
Description of the problem: Inconsistent stitch length throughout sewing.
Cause of the problem: Incorrect stitch length settings or mechanical issues with the machine.
Troubleshooting step-by-step:
- Adjust the stitch length settings on the machine to the desired length.
- Check for any mechanical issues such as worn gears or belts that may affect stitch length.
- Clean the machine thoroughly to remove any debris that may be obstructing the stitch length adjustment mechanism.
- Test sew on scrap fabric while adjusting the stitch length to achieve uniform stitches.
- If the problem persists, consult the user manual for advanced troubleshooting options or seek professional assistance.
Foot Pedal Malfunction
Description of the problem: The foot pedal does not respond or operates intermittently.
Cause of the problem: Loose connection or damage to the foot pedal cord.
Troubleshooting step-by-step:
- Check the connection between the foot pedal and the machine for any signs of looseness.
- Inspect the foot pedal cord for any visible damage such as cuts or fraying.
- Test the foot pedal on another machine if possible to rule out a problem with the pedal itself.
- If the problem persists, consider replacing the foot pedal cord or contacting customer support for further assistance.
- Alternatively, try using the machine with a manual control option if available.
Thread Spool Jamming
Description of the problem: The thread spool gets stuck or jams during sewing.
Cause of the problem: Improper alignment of the thread spool or rough edges on the spool holder.
Troubleshooting step-by-step:
- Ensure the thread spool is placed securely on the spool pin and is aligned properly.
- Check the spool holder for any rough edges or burrs that may be catching the thread.
- Use a spool cap or net to keep the thread spool in place and prevent it from slipping or spinning freely.
- If the problem persists, try using a different type or size of thread spool.
- Clean the spool pin and holder regularly to remove any dust or debris that may accumulate.
Bobbin Case Jams
Description of the problem: The bobbin case gets stuck or jams while sewing.
Cause of the problem: Improper insertion of the bobbin case or debris buildup in the bobbin area.
Troubleshooting step-by-step:
- Turn off the machine and remove the needle plate to access the bobbin area.
- Carefully remove the bobbin case and check for any obstructions or debris.
- Clean the bobbin case and surrounding area thoroughly with a brush or compressed air.
- Reinsert the bobbin case making sure it is properly seated and aligned.
- If the problem persists, consider replacing the bobbin case or seeking professional assistance.
Needle Plate Scratches
Description of the problem: Scratches or damage appear on the needle plate.
Cause of the problem: Incorrect needle plate installation or use of incorrect needles.
Troubleshooting step-by-step:
- Inspect the needle plate for any signs of damage or scratches.
- Ensure the needle plate is installed correctly and securely onto the machine.
- Check that the needle being used is appropriate for the fabric and sewing task.
- If the needle plate is damaged, replace it with a new one to prevent further issues.
- Regularly clean and maintain the needle plate to prolong its lifespan and prevent future damage.
Thread Fraying
Description of the problem: Thread frays or shreds while sewing.
Cause of the problem: Using old or low-quality thread, or incorrect needle size.
Troubleshooting step-by-step:
- Check the condition of the thread and replace it with a fresh spool if it is old or worn.
- Use high-quality thread appropriate for the fabric being sewn.
- Ensure the needle size matches the thread weight and fabric thickness.
- Inspect the needle for any burrs or rough spots that may be causing the thread to fray.
- If the problem persists, try adjusting the tension settings or using a different type of needle.
Bobbin Thread Tension Too Tight
Description of the problem: The bobbin thread tension is too tight, causing puckering or thread breakage.
Cause of the problem: Incorrect adjustment of the bobbin tension screw.
Troubleshooting step-by-step:
- Remove the bobbin case from the machine and inspect the tension screw.
- Loosen the tension screw slightly using a small screwdriver.
- Reinsert the bobbin case and test sew on scrap fabric to check the tension.
- Continue adjusting the tension screw as needed until the desired tension is achieved.
- If necessary, consult the user manual for specific instructions on adjusting the bobbin tension or seek professional assistance.
Husqvarna Viking Practica II model 5220 Sewing Machine Manual
For detailed operating instructions and troubleshooting guidance specific to the Husqvarna Viking Practica II model 5220 sewing machine, you can refer to the official manufacturer website. The manual provides comprehensive information on setting up, operating, and maintaining your sewing machine, helping you get the most out of its features and addressing any issues that may arise.
Frequently Asked Questions about the Husqvarna Viking Practica II model 5220
1. How do I adjust the tension on my Husqvarna Viking Practica II model 5220?
To adjust the tension on your sewing machine, refer to the user manual for specific instructions. Typically, tension adjustments can be made using the tension dial or knob located on the machine. Experiment with small adjustments while test sewing on scrap fabric until you achieve the desired stitch quality.
2. What should I do if my Husqvarna Viking Practica II model 5220 keeps jamming?
If your sewing machine is jamming frequently, first turn off the machine and unplug it from the power source. Remove the needle plate and carefully clear out any lint or debris that may be causing the jam. Check the bobbin area and ensure the bobbin is inserted correctly. If the problem persists, consult the user manual for further troubleshooting tips or contact customer service for assistance.
3. How often should I clean and maintain my Husqvarna Viking Practica II model 5220?
It is recommended to clean and maintain your sewing machine regularly to ensure optimal performance. Depending on usage, aim to clean the machine after every few projects or whenever you notice a buildup of lint or debris. Refer to the user manual for specific maintenance instructions, including oiling moving parts and replacing needles and other consumable parts as needed.
4. Can I use different types of thread with my Husqvarna Viking Practica II model 5220?
Yes, the Husqvarna Viking Practica II model 5220 is compatible with a variety of thread types and weights. However, it is essential to use high-quality thread suitable for the fabric you are sewing. Always refer to the user manual for guidance on thread compatibility and tension settings to achieve the best results.
5. What should I do if my stitches are skipping or irregular?
If you are experiencing skipped stitches or irregular stitching, first, check the needle to ensure it is inserted correctly and not bent or damaged. Next, verify that the correct needle and thread are being used for the fabric type. Adjust the tension settings as needed and test sew on scrap fabric to determine if the issue persists. If problems persist, refer to the troubleshooting section of the user manual or contact customer service for assistance.
Conclusion
For any problems encountered with your Husqvarna Viking Practica II model 5220 sewing machine, it is advisable to consult the manual, customer service, or a service center whenever possible. These resources can provide valuable guidance and support to help you address issues effectively and maintain your machine’s optimal performance.
Husqvarna Viking Automatic 51 Common Problems